
| Introduction
| Diagrams
| The Diagram
Toolbar | The
Draw Toolbar | Selected
Symbols |
| Outlines
| Inspiration Examples
and Templates | Terms
|


| Introduction
| Diagrams
| The Diagram
Toolbar | The
Draw Toolbar | Selected
Symbols |
| Outlines
| Inspiration Examples
and Templates | Terms
|
Inspiration is a software package that helps you create a visual map of ideas or concepts in the form of a diagram. This diagram can also be integrated into an outline format. Both formats are interconnected so all work done in one format (outline) is automatically entered in the other format (diagram). Inspiration is a valuable education tool because learners think, verbalize, visualize and write their ideas. Therefore, retention and understanding of concepts are increased.
Types of Diagrams
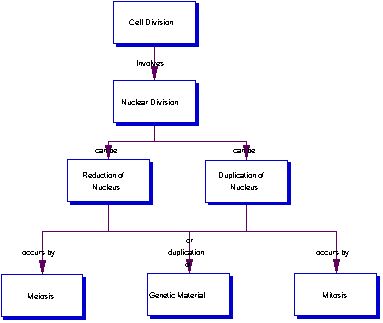
1. Concept map - a hierarchical diagram that represents a set of ideas beginning with the most universal and working down to more particular. These ideas are linked by descriptive words that describe the relationship between these two.Curriculum Example: Science or History
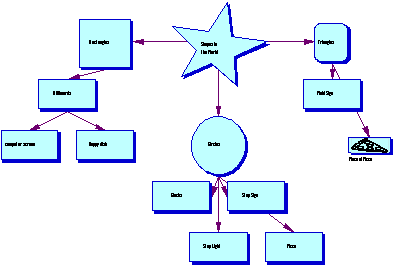
2. Idea map - visual brainstorming technique used to generate ideas and develop thoughts. Begin with a main idea in the middle of the screen.Curriculum Example: Math
3. Web - a way to show how different bits of information relate to each other.
Curriculum Example: Language Arts 4. Storyboard - a visual layout of a project or presentation that helps in planning content and appropriate placement.Curriculum Example: Social Studies

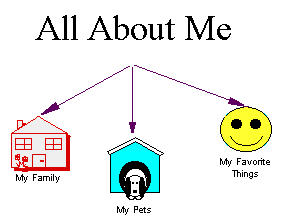
4. Storyboard - a visual layout of a project or presentation that helps in planning content and appropriate placement.Curriculum Example: Social Studies
A New Diagram
Inspiration automatically opens in dialog format with the main idea symbol in the center of the screen as a starting point.
Adding Idea Symbols to a Diagram
1. Create buttons - use to add a symbol in the direction of
arrows, horizontal, vertical or diagonal.![]()
To add linked symbol
- Select a symbol
- Click the arrow on the Create button that points in the direction you wish to add a symbol
- Enter text
To add unlinked symbol
- Click in any open space on the diagram
- Click the arrow on the Create button that points in the direction you wish to add a symbol
- Enter text
2. RapidFire - use to enter linked ideas quickly ![]()
- select a symbol containing text
- click on RapidFire button
- type text for new symbol
- press Enter /Return
- alternate typing text and pressing Enter for each new symbol
- click off symbol when complete
3. Symbol button - Creates a new symbol (same as
Create button) ![]()
4. Point and Type - adds the default symbol (rectangle) anywhere in the diagram
- Point to an empty space in diagram
- Type text
5. Insert Symbol command - inserts a new symbol between two linked symbols
- Click on the link between two symbols
- Select Symbol - Insert Symbol from the menu bar
- Enter text
The Symbol Palette
The Symbol Palette adds a special symbol anywhere in the diagram. Inspiration comes with 41 different symbol libraries. Use the Symbol palette on the left of the screen to view the contents. You may choose from what is there or customize your own library.
To change an existing symbol
- Select the desired library
- Click on the existing symbol you wish to change
- Click on desired symbol in library
To add a new unconnected symbol
- Click on an empty space in diagram
- Select the desired library
- Click on desired symbol in library
Customize your own library:
- Select Utility - Edit Symbol Libraries...
- Click on New Library in dialog box that appears
- Enter a name (Ex. Judy's Library) for the library in the dialog box that appears
- Close all windows by clicking on OK's.
- Select this new library (Ex. Judy's Library) from drop down menu of symbol libraries
- Paste desired graphic into diagram
- Select Utility - Install User Symbol
- Select Utility - Edit Symbol Libraries...
- Select graphic and enter a label to name this graphic
Use to add symbols and links to diagram or to arrange diagram.
Outline Switches to Outline view New Look Sets default styling for new symbols & links RapidFire Use to enter linked ideas quickly Symbol Creates a new symbol Link Creates a fast link between two symbols Add Note Opens the notes text window for the selected symbol Create Adds a new symbol in the direction of arrows, horizontal,
vertical or diagonal Position Lets you move the diagram around the window Arrange Lets you arrange symbols in various tree chart
groupings
![]()
![]()
![]()
![]()
![]()
![]()
![]()
![]()
![]()
Use to move symbols, to color text and symbols, or to draw shapes.
Selection Turns off a tool and returns the cursor to a pointer Freeform Line Draws freeform lines Line Draws straight lines Oval Draws ovals or circles Polygon Draws polygons Rectangle Draws rectangles or squares Rounded Rectangle Draws rectangles or squares with rounded corners Text Box Draws a text box Nudge Moves a symbol or selected object one pixel at a time in
the direction you choose Fill Color Changes the fill color (background) of selected symbols
or objects Fill Line Changes the line color of selected symbols, links, or
objects Text Color Changes the text color of selected symbols or links
![]()
![]()
![]()
![]()
![]()
![]()
![]()
![]()
![]()
![]()
![]()
![]()
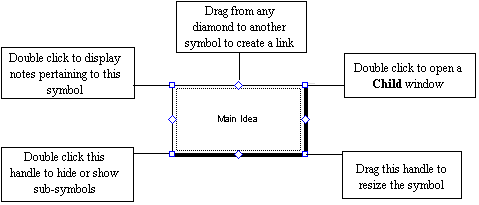
Links
The line that connects symbols.
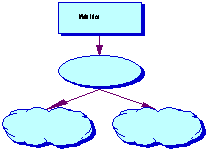
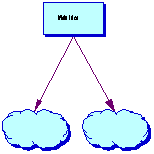
Deleting Objects:
Fine Tuning Tips
1. Symbols
- Align
- Select all items to be aligned (Hold down Shift key and click to select more than one item at the same time)
- Select Symbol then Align then the part of objects you wish to align (Ex. Tops)
- Evenly space
- Select all items to be evenly spaced (Hold down Shift key and click to select more than one item at the same time)
- Select Symbol then Evenly Space
- Auto Symbol Grow - changes the way symbols grow to fit text
- Select all items to be changed (Hold down Shift key and click to select more than one item at the same time)
- Select Symbol then Auto Symbol Grow then
- Standard - symbol grows vertically from the middle
- Proportional - symbol grows vertically and horizontally
- Off - remains same size even if you add text
- Fixed Width - the object remains in position but grows vertically down
- Make symbols the same size
- Select the symbol that has the size you want to use
- Select Edit - Copy from the menu bar
- Select the symbol that you want to make the same size
- Select Edit - Paste Size from the menu bar
- Nudge - to move objects one pixel in desired direction
- Select the symbol
- Click on the Nudge tools on drawing tool bar in the direction desired
2. Grid
- Select Utility - Grid Lines to hide or show the grid
- Select Utility - Grid Snap to cause symbols to snap to closest grid line
Note: If you deselect Grid Snap , grid lines are automatically turned off.
3. Views - allow you to show or hide different parts of the screen
- Select View from the menu bar
- Select desired part to show or hide
- Page Lines
- Rulers
- Symbol Palette
- Toolbar
- Tool Tips
4. Properties - the default settings in Inspiration
- Select File - Diagram Properties
- Click on desired tab
- Make desired changes
- Click on any other desired tab
- Make desired changes
- Click on OK when all changes are made
Note: To revert settings back to the original installation click on Factory Settings in Diagram Properties window.
5. Spell Checker
- Select Utility - Spell Check from the menu bar
- Click on Start in the dialog box that appears
- Close this window when completed.
6. Print Options
- Select File - Page Options from the menu bar
- Select desired option
7. Shortcuts
- Press Ctrl "M" to select the main idea regardless of where you are in the diagram.
- All standard shortcuts are also available (Save, Print, Copy, Paste, Bold, Etc.)
The Outline Toolbar
Diagram Switches to Diagram view Add Topic Adds a topic below current topic at the same level
(except on Main idea) (Ctrl "G" ) Add Sub Adds a subtopic below current topic one level to the
right Add Note Moves the cursor into the notes text area for the
selected topic Left Moves a topic and it's subtopics to the left one
level Right Moves a topic and it's subtopics to the right one
level + - Sub Hides or shows the subtopics for the selected topic + - Note Hides or shows notes for the selected topic Prefix Allows you to change the numbering system of the
outline Properties Allows you to change the outlining style and other
formatting such as margins, headers and footers, and page
layout.
![]()
![]()
![]()
(Ctrl "K" )
![]()
![]()
(Shift - Left Arrow)
![]()
(Shift - Right Arrow)
![]()
![]()
![]()
![]()
Editing Outlines
Examples
Another beneficial section in Inspiration are the curriculum based examples available. The examples are divided into three categories English-Reading, History-Social Studies, and Science each containing 4 specific lessons.
To open Inspiration Examples:
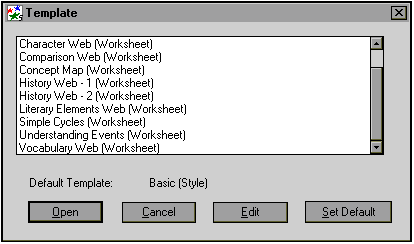
Inspiration contains 11 templates that can be used as a starting point for a diagram. Look at these templates to get an idea of how to integrate Inspiration into your classroom curriculum.
To open a template in Inspiration :
Note: You may change the default template in this same dialog box if desired.
Acknowledgements
|
Denise Burke |
Technology Liaison - Houston Elementary |
|
Mona Butler |
Consultant Region 11 |
|
Amy Hardy |
Teacher - Denton High School |
|
Steve Speer |
Instructional Technologist - Ryan High School |
|
Connie Swiderski |
Instructional Technologist - Denton High School |
|
Denton ISD Technology |
|
Revised: 05/29/1998 |
Published on Teachers Connect by permission from the Denton Independent School District.