|
|
|
Draw tool || Student Disk folders || Drag image || The wrong way || Move image || Resizing || Text wrap || Using the clippings || Inserting pictures || Sources of images and copyright
|
|
|
Before you start looking for your image, open the red toolbox at the bottom left of the page, and then select the draw tool (the arrow) in the grey tool bar down the left of the page. Don't forget!
In Student Disk, you will find folders of pictures that you can use. Open the folder, and look for the kind of picture that you want. Remember that many of them will look better on screen than they will printed out in black and white.
3. Drag the image across to the page
Now drag the picture you want across from the folder to the page until the edges of the page turn blue - then let go the mouse. It will turn from words into a picture, like the example below.
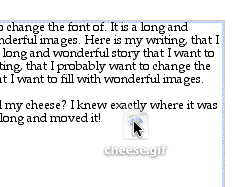 ------------->
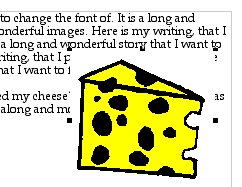
If your image looks like this, you have done it wrong - you are still in the text tool, so your image is put in as text. You can tell because there is only one handle and a dotted line around the image. If this happens, select the image, go Edit - Cut, and then choose the draw tool. Now go Edit - Paste.
5. Move the image to where you want
If your image has four handles, and no dotted line around it, you are in the draw tool, and you have done it right. Put your cursor in the middle of the image and drag it around to where you want. Move it from the middle, remember!
You can resize the image by dragging it from one corner. Be careful - you can make it look pretty silly! To keep it in proportion, hold your finger on the shift button while you drag in and up from an outside corner.
You can make the text wrap around the picture by going Option - Text wrap, then choosing the regular option. Make sure you have selected the image first (given it handles by clicking on it).
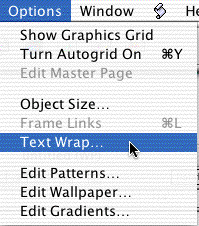 .........................................
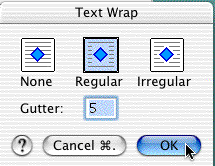
Then your story and picture will look like this.
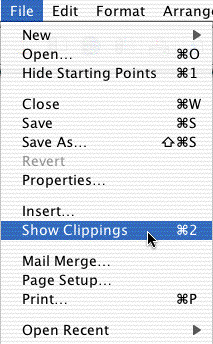
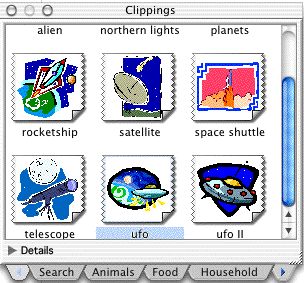
You can also choose pictures from the clippings library in Apple Works. Go File - Show clippings, and choose the category you want from the tabs along the bottom of the clippings window.

.. ..........
You get more choices by using the blue arrows on the last tab. Put it into the story the same way you put the other image in - by dragging it across (making sure you are in the draw tool first.)
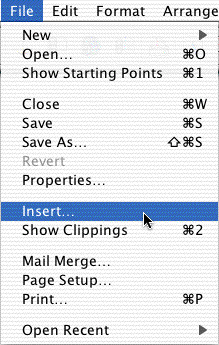
You can also insert art work from other places. First select the draw tool, then go File - Insert. You must now navigate (starting from the Desktop) to the folder where that art is stored, and then highlight it, and click insert.
 ......
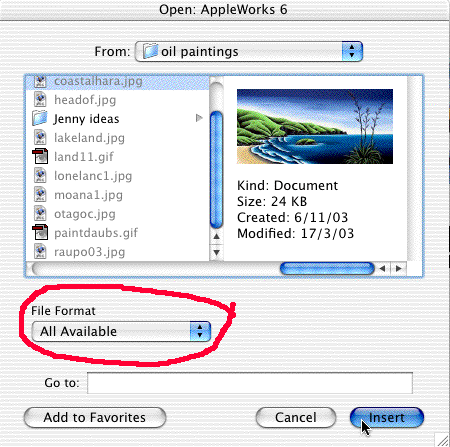
One important point - if it won't insert, make sure that under File Format (under the navigating window) it says All Available, and not AppleWorks.
10. Sources of images and copyright issues
You can use images from the folders on the Student Disk (Pictures for Slideshows and Pictures for HyperStudio), or your own art work in Dabbler or in KidPix.
You must not use pictures from other people unless you ask permission first, and you say in your work where you got the picture from.
If you use pictures from the intranet or internet, you MUST ALWAYS do this. It is breaking copyright to use somebody else's art work without permission. The only pictures you can use freely without asking are the Student Disk ones, or the AppleWorks clippings, and your own art work. EVERYTHING ELSE must be acknowledged (ie you ask your teacher if you may use it, and you say where you got it from in your work).